A number of guys have been asking me how my Proton Wira upgrade is getting along and my answer is sadly, "Not much".
Since my last update: Proton Wira modifications under RM1K project: Part 2
I have made very few upgrades to my Dad's old Proton Wira which has in fact become my car - to drive to Work, fetch the kids from school, etc. The main reason behind the delay is probably because of my stubborn insistence on doing most of the work myself - DIY, and various other reasons - too busy with work and the kids, lack of a proper garage at home to work in, lack of tools, blah blah but I realise most of them are excuses I make to myself.
The thing is that I have a conflict in my head/ heart going on deciding whether it is worth it to spend so much money on an old car when I could just put it down for installment on a brand new car which comes with no headaches for at least 3 years. Maybe it had to do with the numerous people telling me to get a new car, including my parents and even my daughter.
There were a few incidents as well - the car air conditioning started having problems and then I noticed engine heating up. Later I found out that the fan was not working and had to get it changed. Then a lady reversed her car onto mine - fortunately the damage was not that bad and I it took just half a day to get the bump repaired and repainted at the paint shop near my house. Finally, the dreaded power window failure happened. Now the right hand window can't go up or down. Just made me realise how Proton's lack of quality control, especially with regards to the power window, totally destroyed customer loyalty and lead to the troubles it is currently facing now. However, the fact that I have no debts makes me really reluctant to get a new car - I will be paying off debts to the banks for at least 6 years.
If I do eventually buy a car, it will be paid for in cash and I plan to buy a Mercedes A class, or maybe a BMW 1 series. I prefer a small zippy car. However, it is definitely going to take some time to accumulate the amount of money needed and who knows, by then we would all probably be using driverless cars by then.
I did have some work done.
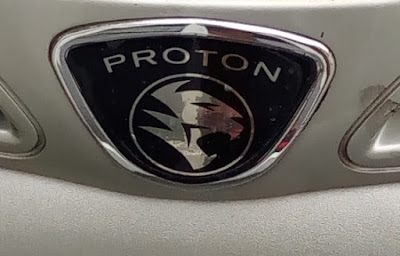
1. I changed the emblem in the front from the green - golden one to the new silver-black one. I got it cheap at Brothers. Definitely looks better.
2. I also changed the old worn out gear stick cover to new ones. Bought the new cover online on Lelong.com.my. Installation was fairly easy.
3. I then had my steering wheel changed as well to a Fake Momo from Brothers. I have no idea how they can get away with selling fake items. Fitting it was also a pain as their workers (new staff) took ages to fit it on my car.
I hate fake stuff and ended up regretting buying the steering almost immediately. I tried removing the Momo logo sticker on the middle of the steering wheel and it now looks terrible. This is something I have got to change soon to a genuine Momo steering or maybe a Nardi, but spending about RM 500+ on a brand new steering wheel is something not on top of my priorities right now.


4. One thing I knew I could do myself quite fast were the pedals. So I bought Ralliart pedals from the Maxaudio site and installed them myself. The easy part were the clutch and brake pedals. However, to install the accelerator pedals, I found out that I would have to drill holes in them. In the end I ended up super-gluing them on - using super strong Araldite glue.

5. Finally I had Ultra Racing strut bar installed in the front. I thought I would do myself but I could not shift the crews even a few mm and finally had to go to my favorite garage where Paul and his team installed. The car handing dos feel better with less body roll after the installation but I may be imagining it.

I have a list of things I plan to do on my car, so wait for my next update.
Since my last update: Proton Wira modifications under RM1K project: Part 2
I have made very few upgrades to my Dad's old Proton Wira which has in fact become my car - to drive to Work, fetch the kids from school, etc. The main reason behind the delay is probably because of my stubborn insistence on doing most of the work myself - DIY, and various other reasons - too busy with work and the kids, lack of a proper garage at home to work in, lack of tools, blah blah but I realise most of them are excuses I make to myself.
The thing is that I have a conflict in my head/ heart going on deciding whether it is worth it to spend so much money on an old car when I could just put it down for installment on a brand new car which comes with no headaches for at least 3 years. Maybe it had to do with the numerous people telling me to get a new car, including my parents and even my daughter.
There were a few incidents as well - the car air conditioning started having problems and then I noticed engine heating up. Later I found out that the fan was not working and had to get it changed. Then a lady reversed her car onto mine - fortunately the damage was not that bad and I it took just half a day to get the bump repaired and repainted at the paint shop near my house. Finally, the dreaded power window failure happened. Now the right hand window can't go up or down. Just made me realise how Proton's lack of quality control, especially with regards to the power window, totally destroyed customer loyalty and lead to the troubles it is currently facing now. However, the fact that I have no debts makes me really reluctant to get a new car - I will be paying off debts to the banks for at least 6 years.
If I do eventually buy a car, it will be paid for in cash and I plan to buy a Mercedes A class, or maybe a BMW 1 series. I prefer a small zippy car. However, it is definitely going to take some time to accumulate the amount of money needed and who knows, by then we would all probably be using driverless cars by then.
I did have some work done.
1. I changed the emblem in the front from the green - golden one to the new silver-black one. I got it cheap at Brothers. Definitely looks better.
2. I also changed the old worn out gear stick cover to new ones. Bought the new cover online on Lelong.com.my. Installation was fairly easy.
3. I then had my steering wheel changed as well to a Fake Momo from Brothers. I have no idea how they can get away with selling fake items. Fitting it was also a pain as their workers (new staff) took ages to fit it on my car.
I hate fake stuff and ended up regretting buying the steering almost immediately. I tried removing the Momo logo sticker on the middle of the steering wheel and it now looks terrible. This is something I have got to change soon to a genuine Momo steering or maybe a Nardi, but spending about RM 500+ on a brand new steering wheel is something not on top of my priorities right now.


